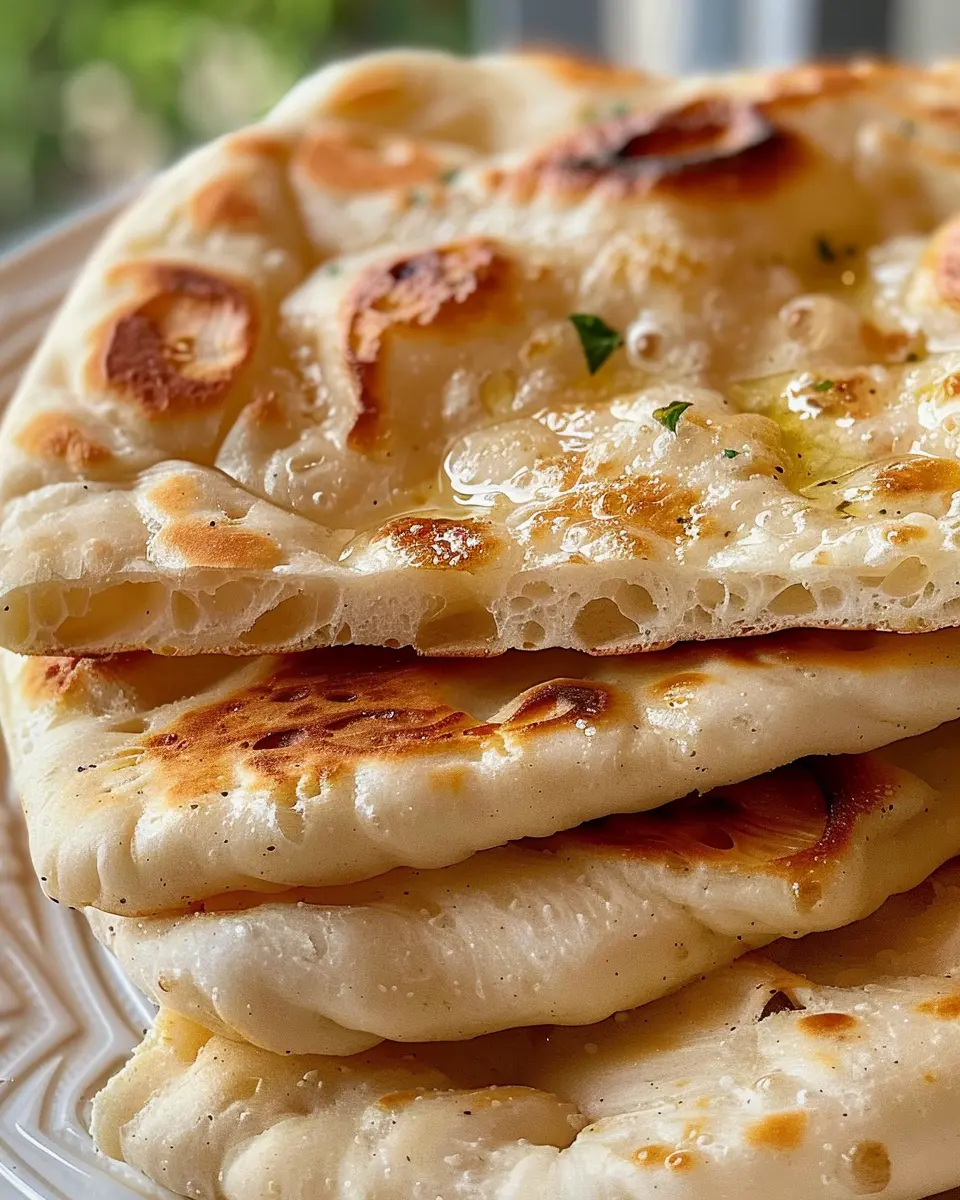
Introduction to No-Oven Turkish Bread
If you’re a young professional juggling work commitments, social life, and trying to eat healthily, the idea of baking bread might seem daunting. But what if I told you that making delicious No-Oven Turkish Bread takes just three ingredients and a few simple steps? Yes, you read that right! This easy recipe lets you whip up homemade bread in virtually no time—all without the hassle of checking your oven.
Imagine the aroma of warm, freshly made bread wafting through your kitchen, while you finish off a project or unwind after a long day. You don’t need to be a culinary whizz to take on this delicious endeavor. In fact, this recipe is the perfect gateway into the world of baking for beginners or anyone with a busy schedule.
Why No-Oven Turkish Bread is Ideal for Young Professionals
-
Speedy Preparation: This bread can be mixed and prepped within minutes, allowing you to focus on your other responsibilities. You don’t have to wait around for dough to rise or worry about preheating your oven. Just combine your ingredients and cook it on the stovetop!
-
Minimal Ingredients: With only three ingredients—flour, yogurt, and baking powder—you won’t need to make a special trip to the grocery store for niche items. Plus, these staples are likely already in your pantry. Feeling adventurous? You can even mix in some herbs or spices to jazz things up.
-
Versatile Usage: Perfect for breakfast, lunch, or dinner, No-Oven Turkish Bread can be enjoyed with just about anything. Pair it with Turkey Bacon, Chicken Ham, or even a light salad to increase your meal variety without the added effort.
In a world where convenience often sacrifices quality, this No-Oven Turkish Bread stands out as an exception. Not only is it easy and quick to make, but it’s also incredibly rewarding. Plus, it’s a fantastic way to impress your friends at your next gathering, as freshly baked bread always boasts a special touch.
Ready to roll up your sleeves? Let’s dive into the detailed recipe that will open up your culinary horizons! For more inspiration, feel free to check out articles on cooking techniques and bread-making tips that can enhance your baking journey.
Ingredients for No-Oven Turkish Bread
Creating delicious No-Oven Turkish Bread is incredibly simple and only requires a few key ingredients that you probably already have in your pantry!
Essential ingredients for the dough
To whip up this quick and delightful bread, gather these three essential ingredients:
- Flour: All-purpose flour works great, giving your bread a perfect texture.
- Yogurt: Use plain yogurt. It adds moisture and creates a tender crumb in the bread.
- Baking powder: This is a crucial element that helps the dough rise beautifully despite not using an oven.
These three ingredients combine to form a soft, flavorful dough that will have your kitchen smelling divine in no time!
Optional toppings to elevate your bread
Want to take your No-Oven Turkish Bread to the next level? Consider adding:
- Sesame seeds: For a lovely crunch and nutty flavor.
- Chopped herbs: Fresh parsley or dill can add a burst of freshness.
- Shredded cheese: A sprinkle of feta or mozzarella can introduce a creamy element.
Experimenting with these toppings allows you to personalize your bread to suit your taste. Enjoy the process, and happy baking! For more tips on bread-making, check out sources like Serious Eats.
Preparing No-Oven Turkish Bread
Have you ever craved the fluffy, warm, and slightly chewy texture of traditional Turkish bread but felt deterred by the oven-intensive process? If so, you’re in for a treat! This recipe for No-Oven Turkish Bread utilizes just three ingredients and can be prepared directly on your stovetop. Let’s dive into the steps to create this delightful bread that you’ll find perfect for wraps, sandwiches, or simply as a side with your favorite dishes.
Mixing the liquids and yeast
Begin your No-Oven Turkish Bread adventure by preparing the liquid ingredients. You’ll need warm water (around 110°F) and a sprinkle of active dry yeast.
- Pro Tip: Activate the yeast by mixing it into the warm water and allowing it to sit for about 5-10 minutes until it becomes frothy. This tells you that your yeast is alive and ready to help your dough rise.
While you wait, consider this: Yeast is a fascinating organism! It feeds on sugar and produces carbon dioxide, which creates those lovely air bubbles in your bread.
Combining dry ingredients
While the yeast is doing its magic, grab another bowl to combine your dry ingredients: all-purpose flour and a pinch of salt.
- Salt’s Role: Salt not only enhances the flavor of the bread, but it also strengthens the gluten structure, resulting in a better texture.
Whisk the flour and salt together until well-combined. This step ensures that the salt is evenly distributed throughout the flour, which is key to achieving consistent flavor and texture in your No-Oven Turkish Bread.
Kneading the dough to perfection
Now that your liquids and dry ingredients are ready, it’s time to bring them together. Pour the yeast mixture into the bowl with the flour and salt. Mix until a rough dough forms, then transfer it to a clean, lightly floured surface.
- Kneading Technique: Use the palm of your hands to push the dough away, fold it back, and repeat. Knead for about 8-10 minutes until the dough is smooth and elastic.
This step is crucial because kneading develops the gluten, which will help your bread rise beautifully when cooked.
Proofing the dough for optimal rise
Once your dough is kneaded, it’s time to let it rise! Place it in a lightly oiled bowl and cover it with a kitchen towel. Leave it in a warm spot for about 30-45 minutes or until it doubles in size.
- Why Proofing Matters: This fermentation process allows the dough to expand and develop flavors, leading to a more delicious No-Oven Turkish Bread.
Consider reading more about the fermentation process from sources like Serious Eats for a deeper understanding.
Shaping the dough into rounds
After proofing, gently punch the dough down to release the air. Divide it into equal portions (about six pieces is ideal for personal-sized rounds). Roll each piece into a ball and then flatten slightly into discs.
- Personal Touch: You can make them thicker for a more chewy experience or thinner for a crispier texture, depending on your preference!
Baking on the stovetop
Heat a non-stick skillet or pan over medium-low heat. Once it’s hot, carefully place your shaped dough rounds into the skillet. Cook for about 2-3 minutes on each side or until golden brown and cooked through.
- Tip: If you want an authentic touch, place a lid on the skillet to trap steam, which helps cook the bread fully while retaining moisture.
Final touches and cooling
After cooking, remove the rounds from the pan and let them cool slightly on a wire rack.
- Serving Suggestion: Brushing with a bit of olive oil and sprinkling with herbs can elevate the flavor, making each bite an explosion of aromatic goodness!
Now that you’ve mastered No-Oven Turkish Bread, experiment with fillings or serve them with your morning coffee. Enjoy the warm, delicious taste of homemade bread without ever firing up your oven!

Variations on No-Oven Turkish Bread
Herbed Turkish Bread Variations
There’s something magical about adding fresh herbs to your No-Oven Turkish Bread. Imagine the aroma wafting through your kitchen as you mix in fragrant herbs like rosemary, thyme, or even dried oregano. Here’s a simple way to enhance your bread:
- Rosy Touch: Add 1 tablespoon of fresh rosemary and a pinch of garlic powder for a Mediterranean twist.
- Herbal Medley: Blend a mix of parsley, basil, and dill into your dough for a vibrant herbal flavor.
These combinations not only elevate the taste but also present a beautiful visual appeal. Plus, experimenting with herbs can inspire creativity and invite a bit of nature into your home.
For guidance on using specific herbs and their benefits, check out this Herb Information Resource.
Sweet Variations for Breakfast or Dessert
If you have a sweet tooth, consider turning your No-Oven Turkish Bread into a delightful treat! Swapping out some dry ingredients can lead to a fantastic breakfast or dessert option that’ll please any palate.
- Cinnamon Sugar Delight: Mix in a tablespoon of cinnamon and a touch of sugar for a sweet morning bread. Serve it warm, drizzled with honey.
- Fruit Toppers: Add mashed bananas or finely chopped apples directly into your dough. The natural sweetness adds moisture and flavor, making each bite delightful.
With these ideas, your No-Oven Turkish Bread can cater to both savory and sweet cravings. Not only is the recipe flexible, but it also encourages creativity in the kitchen—because who doesn’t love a little culinary adventure?
Cooking Tips for No-Oven Turkish Bread
Choosing the right pan for stovetop baking
When making No-Oven Turkish Bread, selecting the right pan can make a world of difference. A non-stick skillet or heavy-bottomed pan is ideal, as it distributes heat evenly and prevents sticking. If you have a cast-iron skillet, you’re in luck! It retains heat exceptionally well, which helps achieve that perfect, crispy exterior.
Tips for achieving the best texture
To ensure your No-Oven Turkish Bread has that delightful chewiness, consider the following tips:
- Use a lid: Covering the pan while cooking traps steam, helping the bread to rise and cook through.
- Keep the heat moderate: Cooking on too high a flame can lead to an undercooked center. Medium to low heat is your best friend.
- Experiment with hydration: If your dough feels dry, add a splash of water or milk. A well-hydrated dough will yield a softer texture.
For further inspiration on stovetop techniques, check out resources from culinary experts like Serious Eats. Happy baking!

Serving Suggestions for No-Oven Turkish Bread
Perfect pairings: Dips and spreads
Who doesn’t love a good dip? No-Oven Turkish Bread lends itself beautifully to a variety of spreads. Try it with classic hummus or a zesty tzatziki for a refreshing snack. You can also experiment with a roasted red pepper dip or even a spicy harissa spread for those who like a kick. For a heartier option, serve it with a warm, creamy cheese dip. Each bite of bread paired with these flavors creates a delightful experience that’s sure to impress.
Serving as a side with your favorite dishes
Not only is No-Oven Turkish Bread excellent for dipping, but it serves as a fantastic side for many main dishes. Whether you’re enjoying a flavorful chickpea stew or some grilled chicken, this versatile bread complements various cuisines beautifully. You can even stack slices with turkey bacon or chicken ham for a satisfying sandwich. Furthermore, it’s incredible with a fresh salad drizzled with lemon vinaigrette! For more ideas, check out these delicious side dishes that pair wonderfully with bread.
Feel free to explore and innovate! The possibilities are endless, making your dining experience more enjoyable.
Time Breakdown for No-Oven Turkish Bread
Preparation time
Making your own No-Oven Turkish Bread is a breeze! You’ll need about 10 minutes to gather your ingredients and prepare the dough. While it might seem simple, this crucial step allows the flavors to blend beautifully.
Cooking time
Once your dough is ready, it’s time to cook. This no-oven method involves frying, which will take approximately 15 minutes. Just enough time to flip and watch your bread turn golden brown.
Total time
In total, you’ll spend around 25 minutes creating this delightful No-Oven Turkish Bread. Perfect for a quick snack or a side to your meal! Have you ever noticed how great homemade bread smells? This is the real deal, and it doesn’t take much time at all!
For more tips on quick and delicious recipes, check out Serious Eats for inspiration.
Nutritional Facts for No-Oven Turkish Bread
When it comes to making No-Oven Turkish Bread, you’ll find it not just delightful but also quite nutritious. Here’s a quick rundown of what you’re getting in terms of nutrition.
Calories
This flavorful bread packs approximately 150 calories per serving. It’s a fantastic option for those looking to indulge without overdoing it!
Carbohydrates
With about 28 grams of carbohydrates per serving, this homemade bread is a decent source of energy. It’s perfect for a mid-day snack or as a side to your favorite meals.
Protein
One serving of No-Oven Turkish Bread offers around 5 grams of protein. Although not high, it’s great for complementing a balanced diet. Pair it with some turkey bacon or chicken ham for a protein boost!
By understanding the nutritional value of this easy recipe, you’ll be better equipped to incorporate it into your meal planning. If you’re curious about more healthy recipes, check out Healthline or EatRight for some inspiration!
FAQs about No-Oven Turkish Bread
Can I store No-Oven Turkish Bread?
Absolutely! No-Oven Turkish Bread is quite versatile when it comes to storage. You can keep it at room temperature, wrapped in a clean kitchen towel or in an airtight container for up to three days. If you want to extend its freshness, consider refrigerating the bread, although this may slightly alter the texture. For longer storage, freezing is your best bet. Simply wrap the bread tightly in plastic wrap and place it in a freezer-safe bag. When you’re ready to enjoy it, just thaw it at room temperature or microwave it for a few seconds.
How can I reheat the bread without losing texture?
Reheating No-Oven Turkish Bread thoughtfully can preserve its delicious texture. If you’ve frozen it, let it thaw in the fridge overnight. To warm it up, you can either:
- Place it in a skillet over medium heat for about 2-3 minutes on each side.
- Alternatively, wrap it in foil and put it in a preheated oven at 350°F (175°C) for about 10 minutes.
These methods will help maintain that lovely, soft exterior without it turning chewy or hard!
Creative Variations to Consider
The beauty of No-Oven Turkish Bread lies in its flexibility! Here are some exciting variations you can try:
- Herbed Bread: Add fresh herbs like rosemary or thyme to the dough for an aromatic touch.
- Cheesy Delight: Incorporate cheeses like feta or mozzarella to introduce a rich flavor.
- Sweet Twist: For a dessert option, add a bit of sugar and cinnamon to the dough and serve with honey.
For more inspiration, check out sites like Serious Eats or BBC Good Food for unique recipe ideas! Don’t hesitate to mix and match flavors that suit your palate—you’ll be amazed at what you can create!
Conclusion on No-Oven Turkish Bread
Embracing homemade bread in your culinary journey
Creating No-Oven Turkish Bread is a delightful step into the world of homemade baking that requires just three simple ingredients. The warm, fluffy texture and delicious flavor make it a versatile addition to any meal or snack. Imagine pairing this bread with spreads, wraps, or even using it to scoop up savory dishes. By taking on this easy recipe, you’re not just feeding your hunger; you’re nurturing your creativity in the kitchen.
Consider exploring other homemade bread recipes fro748m reputable sources like King Arthur Baking or BBC Good Food to expand your culinary skills. Remember, every loaf you bake is a chance to innovate and express your unique taste! Enjoy your journey into homemade bread!
PrintNo-Oven Turkish Bread: Easy Recipe with Only 3 Ingredients

Learn how to make delicious Turkish bread without an oven using just three simple ingredients.
- Prep Time: 10 minutes
- Cook Time: 15 minutes
- Total Time: 25 minutes
- Yield: 4 servings
- Category: Bread
- Method: Stovetop
- Cuisine: Turkish
- Diet: Vegetarian
Ingredients
- 2 cups all-purpose flour
- 1 cup yogurt
- 1 teaspoon baking powder
Instructions
- In a mixing bowl, combine the flour, yogurt, and baking powder.
- Knead the dough until smooth, then divide it into small balls.
- Flatten each ball into a circular shape.
- Cook each piece on a heated non-stick pan for about 3-4 minutes on each side.
Notes
- Ensure the pan is well-heated before placing the dough.
- Serve warm with dips or spreads.
Nutrition
- Serving Size: 1 piece
- Calories: 150
- Sugar: 0g
- Sodium: 5mg
- Fat: 2g
- Saturated Fat: 0g
- Unsaturated Fat: 1g
- Trans Fat: 0g
- Carbohydrates: 28g
- Fiber: 1g
- Protein: 5g
- Cholesterol: 0mg